This has been a bit of an ongoing project that I finally wrapped up this weekend. We have a nice little office nook area where I built a desk and shelving. We wanted to have an area where we could sit and read, but also wanted to have a pull-out / hide-a-bed couch for when guests come to visit. The problem was that there wasn't a ton of room for the bed to pull out and we didn't want a massive couch in this spot. Instead I more wanted a reading bench with some cushions that had a handy bed built into it.
First I looked online for the mechanism that those hide-a-beds use. It really seems like just a big hinge and spring. To buy just that part was going to run around $500!! No way! I'm far too cheap for that. So I started looking on craigslist for someone getting rid of their sleeper sofa, because naturally one of those would theoretically have a working mechanism in it that I could pull out and put into my bench seat.

People really didn't want to part with their ugly old furniture for cheap. There were some nasty couches I came across and I was not going to give someone a few hundred dollars for them. This couch I lucked into. It showed up in the "free" section... which is of course one of my favorite craigslist categories. As it turned out it was a friend of mine who was trying to unload this thing that their dogs had loved... a lot. She thought I was messing with her when we called up and said we wanted it. I think her exact words were something like, "I thought I was going to get rid of that crappy old couch. You're totally messing with me." and I had a hard time convincing her that I really wanted her piece of sh!t couch... not to compliment my decor, but because I'm cheap and wanted that damn spring/hinge!
So here it is, in all it's glory in the top picture. I think pictures don't do things much justice. It certainly did have a lovely scent of wet dog mixed with about a gallon of febreeze... hahaha.


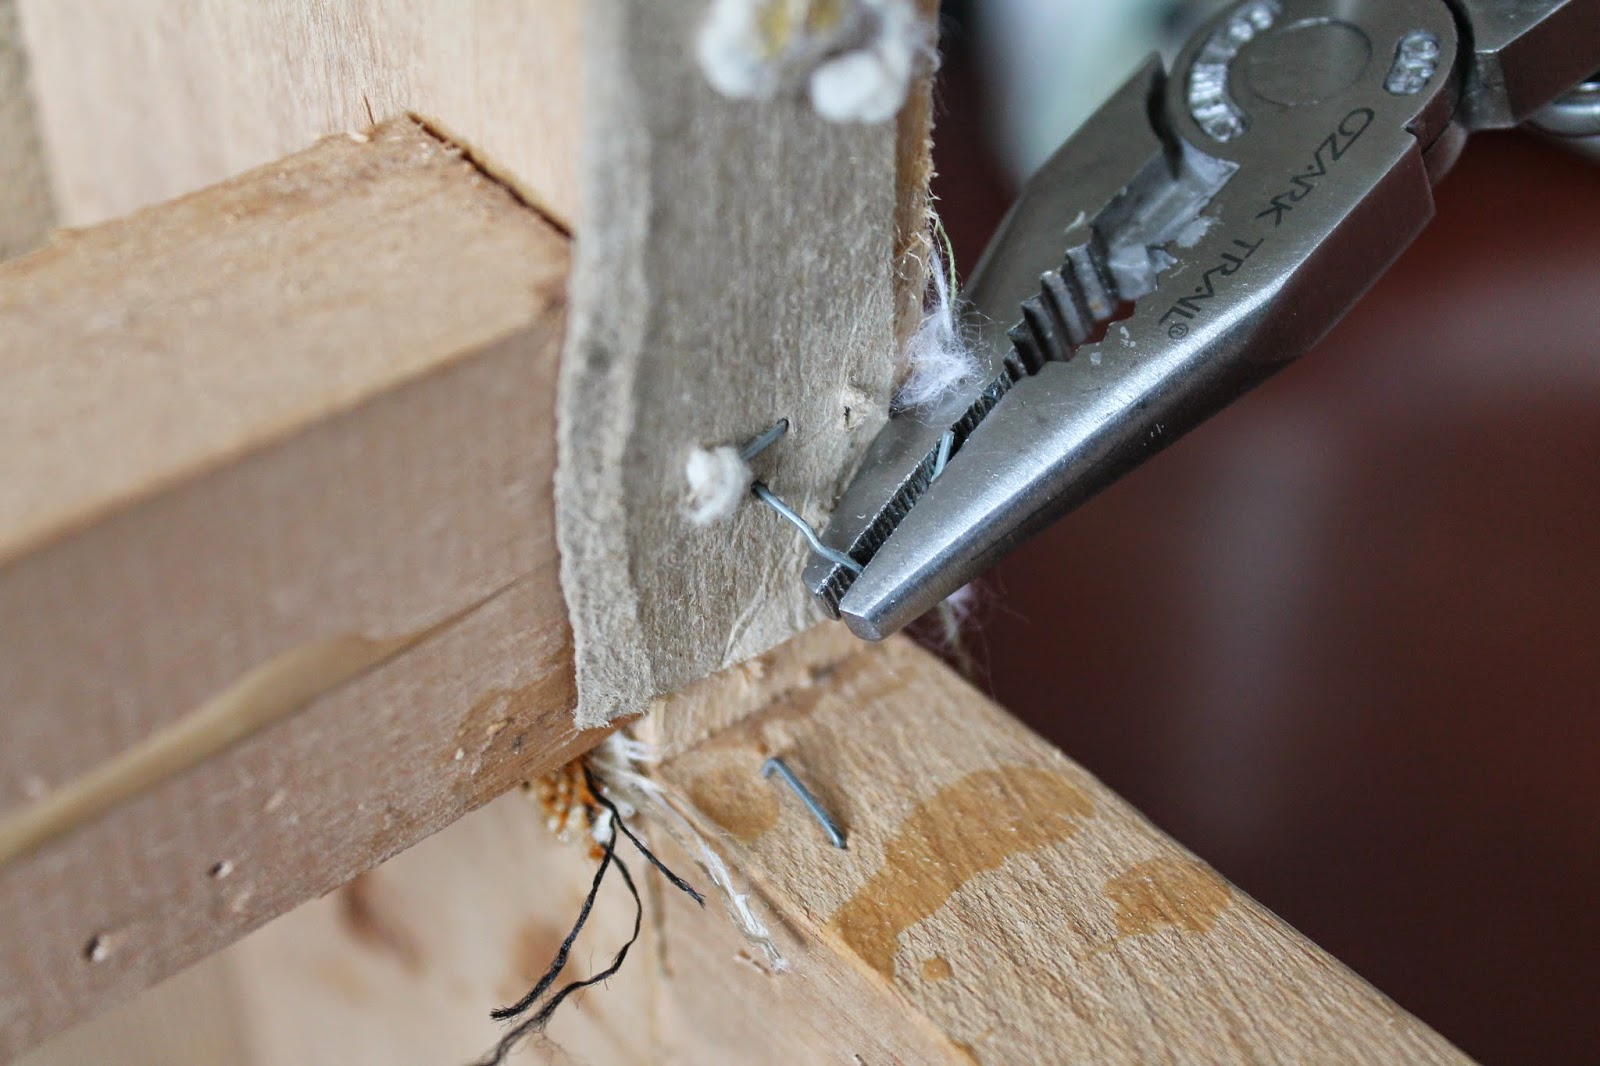
With the staples out of the way I needed to adjust the couch some to make it fit like a bench. We have a low window sill that I wanted the bench to fit underneath. Ours wouldn't fit flush against the wall, because there is still baseboard trim in the way, so I wasn't concerned about getting the couch low enough to slide under the entire window frame, just the most prominent piece. In the top picture, where I started destroying the couch, you can see how the back of the couch runs into the window sill. Then in this picture you can see how I shortened the frame so it would slide under it. It now sits flush against the lower piece of the sill and the baseboard trim. Perfecto. To make this work I had to remove the back of the couch - the part that is covered in fabric that the pillows rest against. This piece isn't necessary for me because you can rest the pillows against the wall and window sill. For that job you're going to want your hammer and pry bar because the back is really well attached to the sides of the couch.

With the couch completely stripped, I could now build it back up. I wanted to match the type of trim we have in other parts of the house as well as the look we have for our entertainment center and kitchen cabinets. It's a very square, shaker-style trim. Which is pretty simple to put together. For this I picked up some HDF (high density fiberboard), which the kind of material they use for clipboards, and some primed 1x2, 1x3 and 1x6 wood. If you were wanting to stain your finished project these materials would need to be more expensive, selecting sandeply (nice, smooth sanded plywood) instead of HDF and then some "select" pine (or whatever wood you like) in the placed of the primed wood I chose. For a painted project I like the primed wood because the priming means the wood isn't going to be quite so thirsty for whatever paint you choose - that means less coats of paint. The trim that's primed is also less expensive. It seems like that's because they are using pine that has been joined together.

See in this picture here all those chevron marks where the different wood is joined together? It makes no difference for this project, but you can see how that type of wood would be garbage if you were wanting to have a stained product. All these materials can be found at your Home Depot or Lowe's.
The HDF goes on first. BTW, I choose HDF over MDF (Medium Density Fiberboard) because I have 2 young boys and they are constantly seeing if they can destroy the house, so the tougher the materials I choose, the less often I have to fix things. :) The HDF is covering the biggest parts of the couch.

The sides...

The inside edge of the arm rest...
And I thought I took a picture of the front of the couch where you legs would hang over, but I guess I didn't. For your project, you'll have to take a look to see where you have open areas that had once been covered by fabric and padding and determine how best to cover it. I cannot imagine many couches not being able to be covered in this same manner.
Next went on the trim.

You can see in this picture how the part your calves would rub against has one vertical piece of trim in the middle, 2 horizontal pieces of trim (all of these are cut from the 1x3 lumber) and they are covering the area where I had applied that other piece of HDF... the one I failed to take a picture of earlier. The arm rests and the vertical piece extending down from the arm rests were cut from the 1x6 lumber. The inside of the arm rests used the 1x2 and the outside ends of the couch is where I used the 1x3 lumber. I had considered adding another vertical piece on the outer edges in the middle, but there was nothing to nail it to.
When you're measuring for your trim pieces, especially those for the arm rests, you need to decide if you want things to line up perfectly or if you want a little overhang. You can see in the picture below that I opted for about 1/4-inch of overhang. I prefer to have a little overhang here because I know if I was trying to line it up perfectly, I would probably miss and that would look dumb. So instead, I made it more intentional looking.

Next step is sanding. You can use an electric sander if you want. There isn't a ton of sanding to be done, though, so I opted for my arm-powered sander. You want to round the sharp corners of that trim some and knock down and roughness in the wood before painting. That way you get a nice smooth finish. For paint I used a Sherwin-Williams oil-based paint with the color Domino. It may look black in the picture, but it is really more of a deep, rich mahogany color. So nice. I like the oil-based variety because it is way more durable than latex, so I can scrub the crap out of it, and you won't have any of it coming off. And I stink at cleaning paint brushes, so I always go into it knowing I will be tossing the paint brush when I'm done. I also make sure to paint in a nice warm house (like around 70-degrees) because it keeps the paint liquid a little longer and lets it flow more, thus creating a smoother surface.


The last step I did was to grab a clearance rack bedding set. I found a twin sized one which was the perfect size, but you may want a slightly larger one just so you have room to make a mistake or two. Then I cut up the comforter and sewed it into pillow-case type covers for the butt cushions and the back cushions.
All-in-all I think it turned out pretty well. My boys, naturally, think it's super comfortable now... just because it looks better. :)

No comments:
Post a Comment